Select the CSP tab in the Numbering system.
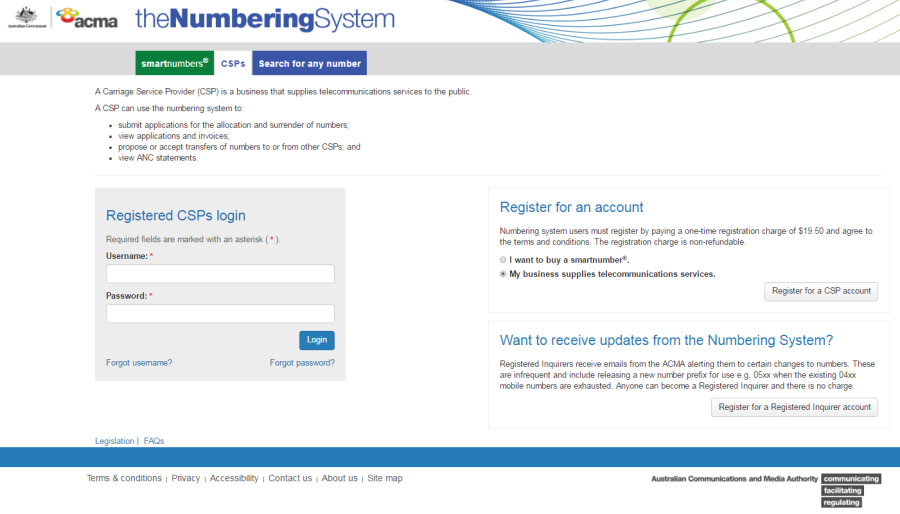
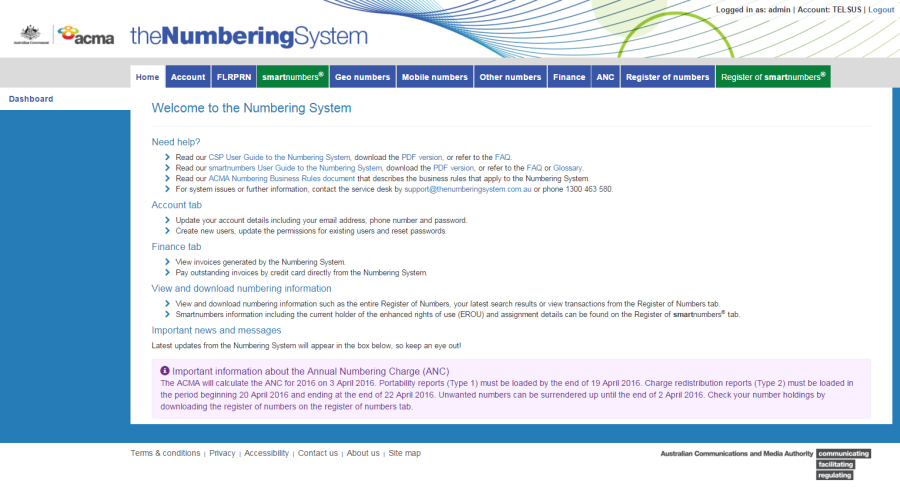
Login with your username and password in the Registered CSPs login box. The 'Dashboard' page will display.
This topic describes how to:
Apply for smartnumber allocation
Select the CSP tab in the Numbering system.
Login with your username and password in the Registered CSPs login box. The 'Dashboard' page will display.
Select the smartnumbers tab. The 'Buy smartnumber' page will display.
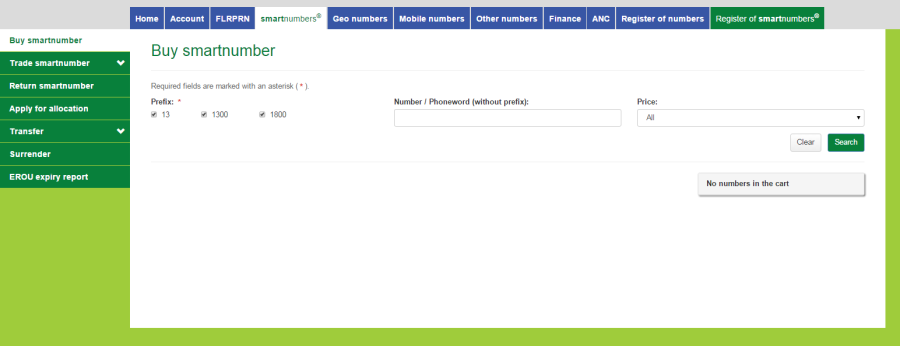
Select the Apply for allocation tab. The 'Standard application' page will display.

Select a Number selection type option — either Exact Number or Range.
Exact Number
Type the smartnumber in the Number box.
Range
Type the start of the number range in the Number from box and type the end of the number range in the Number to box.
If you are not searching for an exact number, you can apply two filters for the search results:
Select the number services type from the Service type dropdown menu — either Freephone or Local rate or All for both.
Type the EROU holder in the Current EROU holder box.
Click Search. The search results will display.
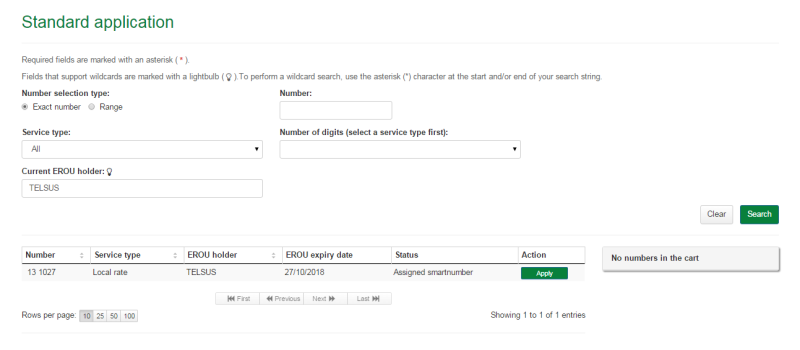
Note: If multiple rows are displayed, click on Next to navigate through them. You can also change the number of rows displayed per page to 25, 50 or 100. You can also sort by column headers.
Note: You can click Clear to redo your search.
Click on Apply in the Action column of a specific smartnumber(s) to apply for allocation. The number(s) is added to the cart as an Apply.

Note: To remove all numbers in the cart, click on Empty cart. To remove a specific number from the cart, click on X next to the number.
Click on Next. The 'Standard application review' page will display.
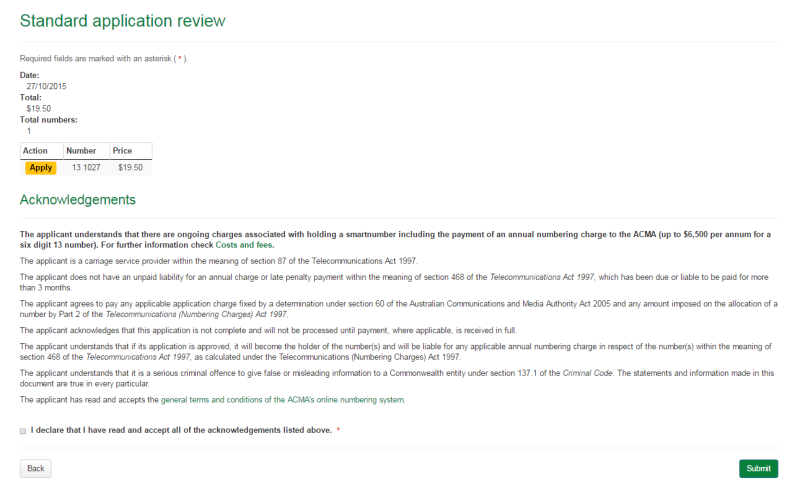
Review your allocation smartnumbers.
Note: If you need to alter details, click on Back and make changes as required.
You are required to read and accept the terms and conditions under Acknowledgements by ticking the checkbox.
Click Submit. The 'Standard application confirmation' page will display.
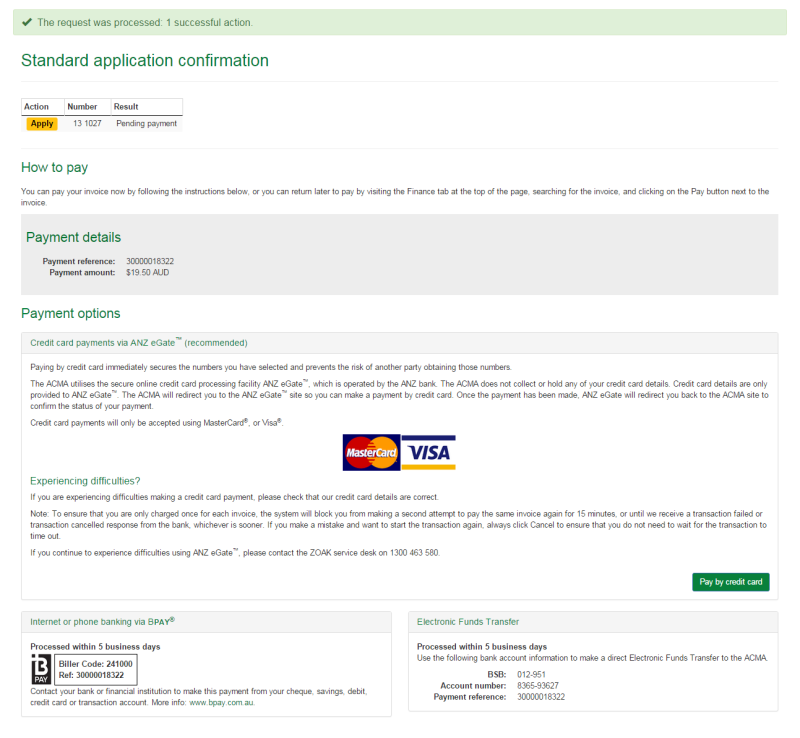
The ‘Standard application confirmation’ page provides the details for paying by BPay or Electronic Funds Transfer — these are also provided on your invoice.
You can also click on Pay by credit card if you wish to pay immediately (refer to Pay now below).
Click on Back to cancel paying, or click Pay by credit card to proceed. The ANZ eGate payment gateway will display.

Click on the appropriate credit card logo (VISA or Mastercard).
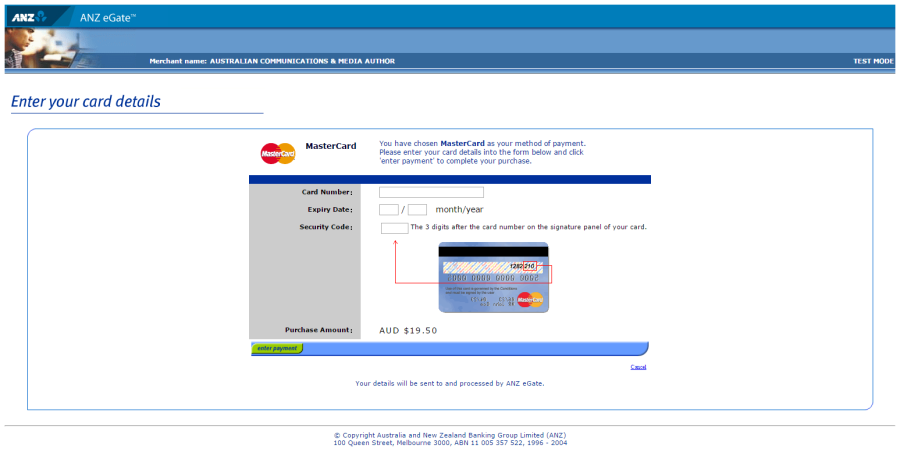
Enter your credit card number, expiry date and security code.
Review your purchase amount.
Note: Click on Cancel if you want to cancel the credit card payment — you will be redirected from the ANZ eGate to the Numbering system. You should login and select theFinance tab to access your invoice so that you can access the payment options again.
Click on Enter payment. The ANZ eGate will process the payment.
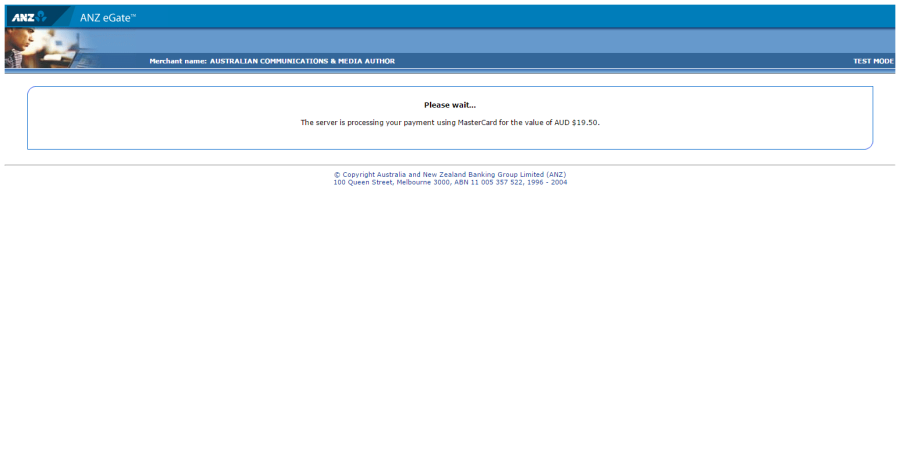
Upon payment approval, you are redirected from the ANZ eGate to the Numbering system.